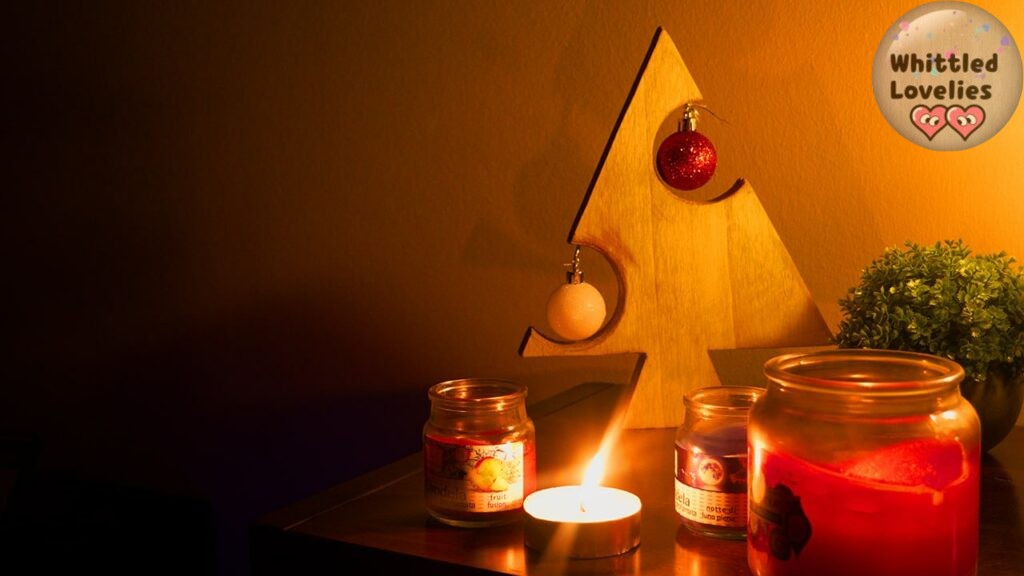
Super simple Christmas decoration!
Hello everyone!!! After exactly one year of articles on the DIY date in Takahama‘s company certainly what stands out the most is his projects are always very easy and very effective, and that is no small quality! And he did not disappoint with this super simple Christmas decoration! Let’s take a look at his project together!
Every Christmas we have to focus on more and more things to do and you have less and less time for decorations so this year I thought I would cut down on the work but not the satisfaction of a well-decorated house.
So I made a very modern and straightforward Christmas tree, but very nice and still with something for my cats to enjoy too! The balls! 🤣
But let’s go straight to the technical data and what you need to accomplish this project with me:
Proceedings
First draw the tree on the board you have available. I in the measurements section above left you the dimensions of my tree which is tiny but you can make it any size you like. The process is the same!
Mark the middle of the board and draw a triangle taking care to leave a space at the bottom where we are going to draw and create the foot of the tree.
Measure your Christmas balls and based on their size (always consider a few extra centimeters for hooking bulk) draw circles, in my case two, that will hold the balls.
Distribute the circles randomly throughout the surface of the tree crown, perhaps helping to draw the circles with a round cap or bottle, whichever best fits your measurements. This is all essential to be drawn full-board before cutting the template.
Now all that remains is to mark the bottom half of the board in the center and create two trapezoids that will join together to create the foot of the tree.
Let’s saw!
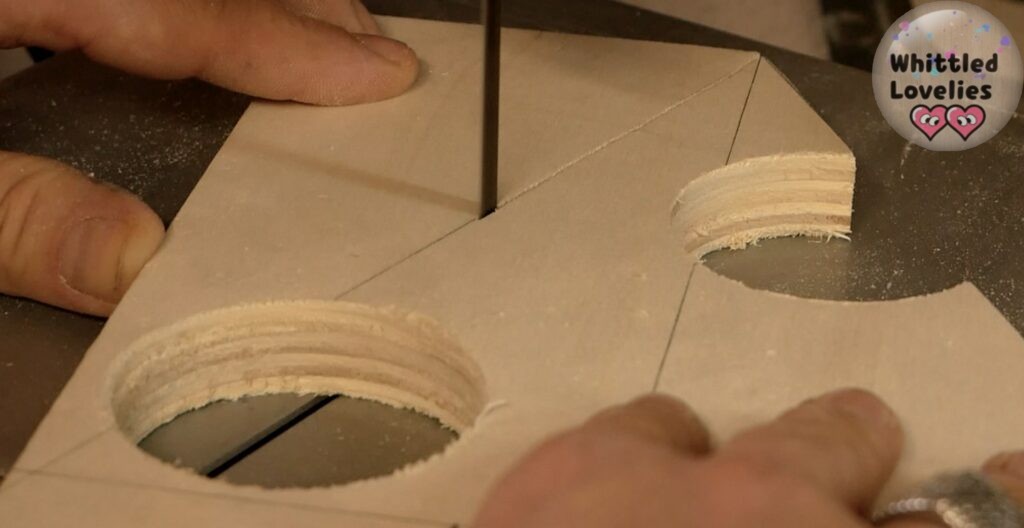
First we attach the hole sawing cup to our drill for the balls (you can even make them different sizes if you have different sized balls!) and start making these circles in the wood.
Then, with a band saw or jigsaw, (but a scroll saw, hand…whatever you have will also do) we follow the lines drawn and cut out the tree. This will also leave the circles you made on the edges open, creating this nice “gruyere” cheese effect.

Once we have cut the entire template, including the foot, we sandpaper well over the entire surface and also in the holes where the balls will go.
At this point we can decide whether to leave the wood as it is or choose as I did to use a solvent stain and countertop paint, or acrylic paints.
We insert as centrally as possible in the holes we created with the hole saw the self-tapping hooks and finally insert the balls to them with their hook. In case of problems help yourself with a piece of wire and create an eyelet.
The end! Here it is nice and ready, our new Christmas tree! As usual I created the video to visually help you through all the steps, you can find it below! See you next project and Merry Christmas to all!
You really can’t say that this Christmas decoration wasn’t really super simple, can you? I also really like this project because it is really easy to adapt to different sizes making it even more practical to make! What do you guys think? Do we promote it Takahama for next year as well? 😉😉
Being Takahama’s first year on the blog I can’t link here to her previous Christmas project, but you can always have a look at the other Christmas-related articles, like making a cute diorama for example! I wish you all a very good holiday season together with your loved ones, we will be here next year! Merry Christmas! 😘🎄🎁😘
This is an article written by a human for humans!
All articles in the blog are written by me. No contributors, no people paid to write content for me.
Posts written by guests or friends of the blog are marked under the title with the words “guest post.” These are friendly collaborations, contributions to the carving community.
No AI (artificial intelligence) support is employed in the writing of blog articles, and all content is made with the intent to please humans, not search engines.
Do you like my content?
Maybe you can consider a donation in support of the blog!

Click on the link Ko-fi to access a secure payment method and confidently offer me coffee or whatever you want!
From time to time, in articles, you will find words underlined like this, or buttons with the symbol 🛒. These are links that help deepening, or affiliate links.
If you are interested in a product and buy it suggested by me, again at no extra cost to you, you can help me cover the costs of the blog. It would allow me to be able to give you this and much more in the future, always leaving the content totally free.
